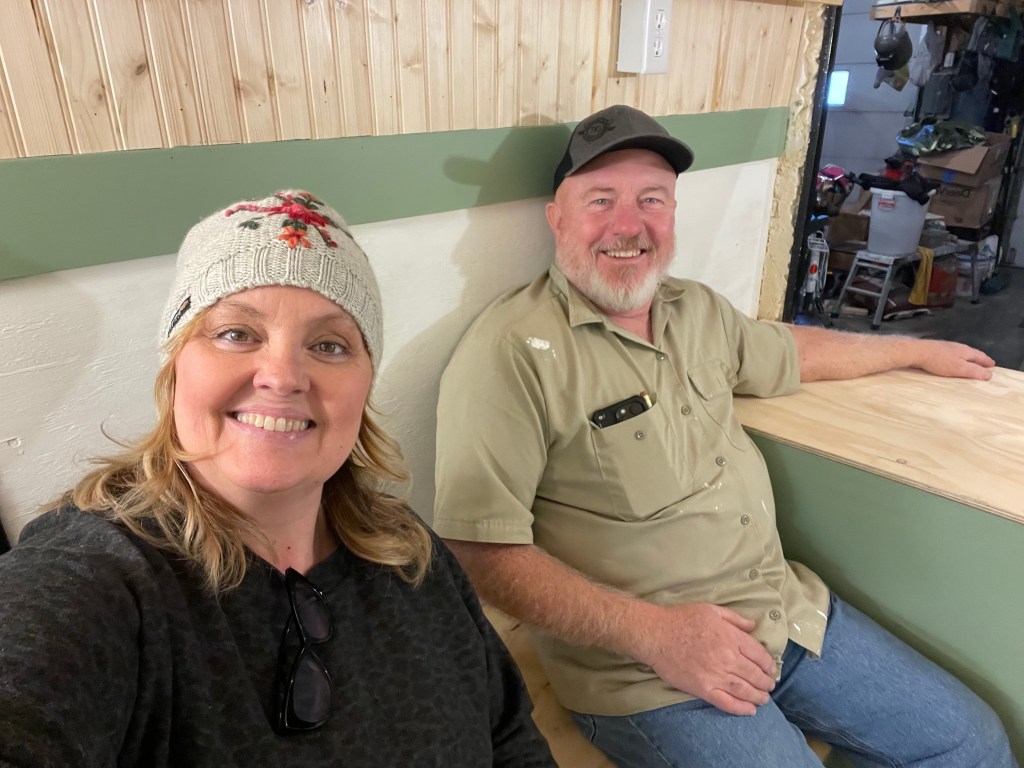
Don, here. My wife asked me to write this portion of our camping adventures. Since I’m not a writer (she is), I said, “I’ll sit down sometime and work on it.” What I meant was, maybe I’ll put it off so long she will take over. I may, or may not, have given her a few little bits of information here and there, but ultimately, I knew she would eventually put her skills to work and make me sound good. In the end, we’ve both put something into this post, and we hope it gives you some info, and maybe some inspiration, on how we built our cargo conversion, so you if you have been contemplating building one, you’ll have some information to help you start.
Let’s answer the most obvious question first. Why would anyone want such a tiny camper? To answer that , first let me explain a few things. There are a couple different schools of thought to camping: 1) you get a huge camper, maybe as big as a medium sized house. You get one almost 14-feet tall and 45-feet long with 4-5 slide outs. It’s kind of a dream; you’re going to take all your family and all your friends and enjoy life together at a place that maybe you can’t afford to live otherwise. So big is your desire.
Those huge rigs are nice, but they come with a ton (or several tons) of problems. Huge trailers demand a huge horse to pull it. And that huge horse eats a lot of feed (gas). Consequently, many people end up going 20 miles up the road and living there for a couple of weeks each year. Now please listen carefully, I’m not against that at all. If that’s what you desire, I’m excited for you. However, 4 mpg , 40-acres to turn around, and 4 hours to get set up was definitely not what I wanted.
The second school of thought is to go as minimal as possible. To go light. As little wind drag as possible. Less set up time means more time for the road, and a little wagon can be pulled by a little horse… and we all know that little horses eat less feed (gas). I wanted easy and mobile. I want to tour with my bed and toilet riding along behind.
You see, our desire was to be able to have the camper loaded, back in at a moment’s notice, hook up, and be heading out to explore, plus get good gas mileage to reduce the cost of traveling. It would also be nice to be able to pull into those small parking lots where big trucks are not allowed. To go under the tunnels in the mountains. But what if you miss your turn? Would it be possible to construct a rig so small that you could sneak an illegal U-turn on a two-lane road if needed? Answer: why, yes you can!
So where would you find such a rig?
We began the hunt.
Let me begin by saying, I’m a contractor (carpenter). I’ve been building houses for more than fifty (50) years. I own a construction business with my son, and together, we have a successful business. I sit down with people regularly, and ask them what they want in a house, then build it. My wife and I have owned campers in the past, but were never completely satisfied with the build, layout, colors, etc. In one used camper, we even remodeled it, updating the interior to suit our tastes. With each camper, I always said that I would love to build a camper out of a cargo trailer. Pre-made campers never suited me, and I would think, why would I go to a dealership and buy an off-the-rack camper that someone else decided the size, content, and colors, when I could build my own and get exactly what I want?
Don’t get me wrong. New and used campers are nice. They make many people happy, and I love that. However, being a contractor, I know how they’re made, and I know my tastes and what I wanted in one. And I want real wood and a structure that I can work on when the need arises. I had just never found the right one for us… until now. Let me show you what I did.
Being in construction, I also pull trailers. Wind drag is a big issue. Another issue is how you load the trailer. If you don’t get the weight distributed correctly, you can have issues with how the trailer pulls, along with swaying, driving issues, and ultimately can cause you to wreck. There are so many issues that can be avoided if you just know how to properly pull a trailer.
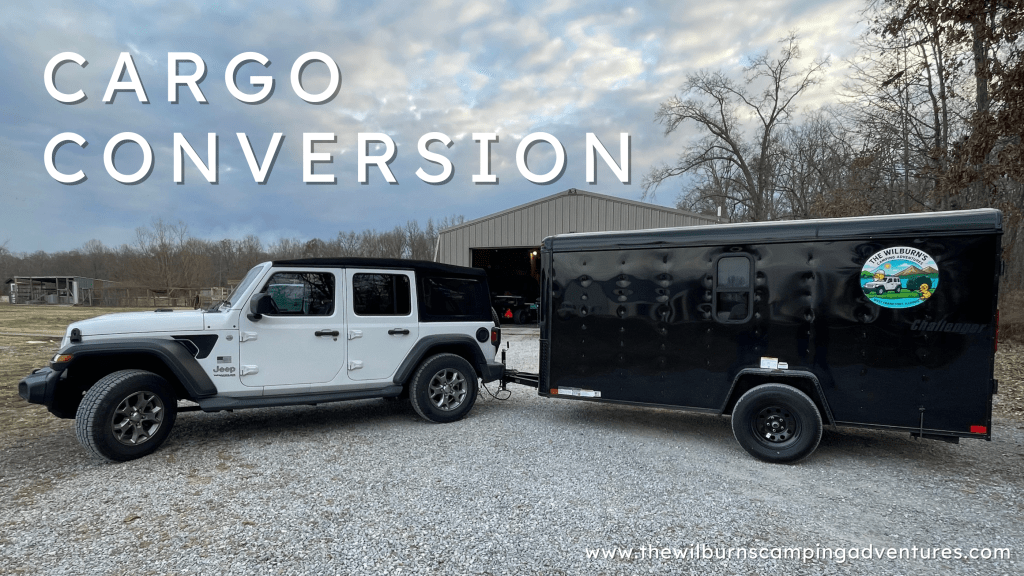
With this build, I wanted something short, that wasn’t taller than my vehicle. The vehicle to pull this camper turned out to be a 2020 Jeep Wrangler. The Jeep has a 3500-pound tow capacity. Since a don’t want to test their numbers and push the limit, I wanted to save a little room. Besides that, I knew that some campers have been known to pick up rocks along the way (not Shelley). Therefore, the cargo trailer needed to be not much taller.
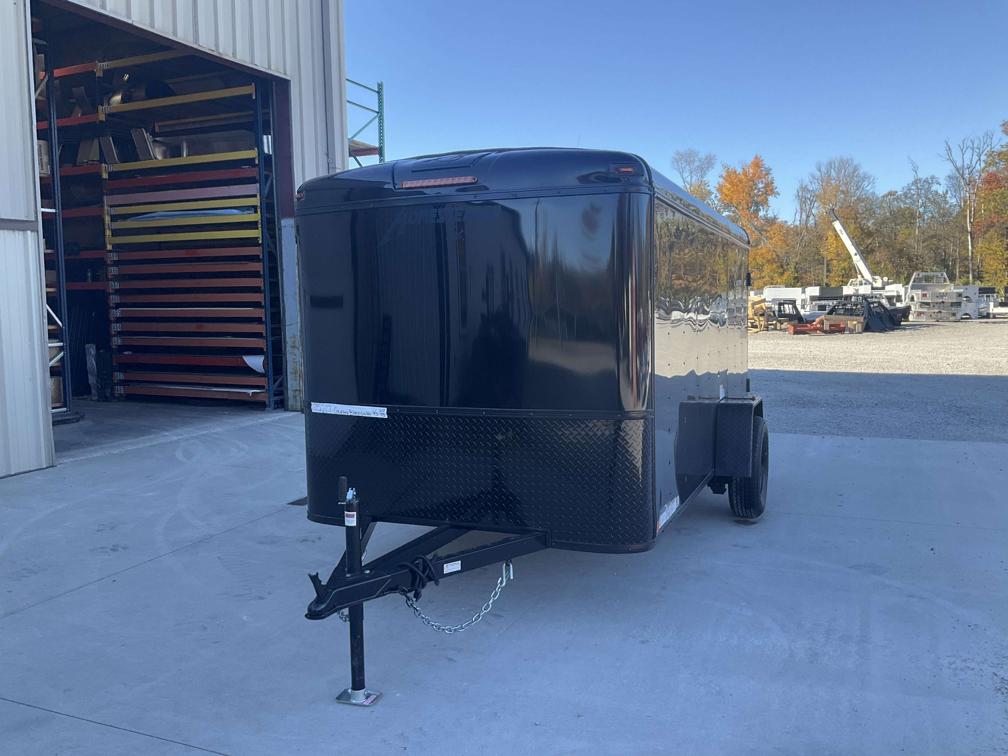
It also needed to be light. So, I ordered a custom made, 6′ x 12′ cargo trailer, with 5′ sidewalls, 7″ rounded roof and 7″ rounded front wall, to help with wind deflection.
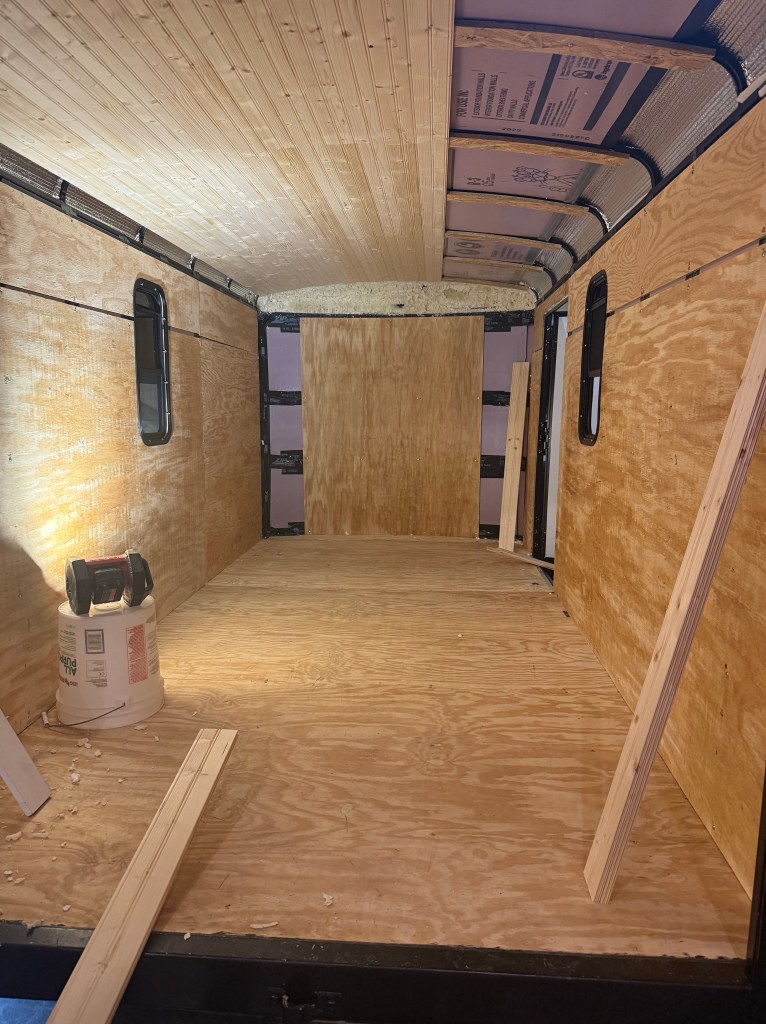
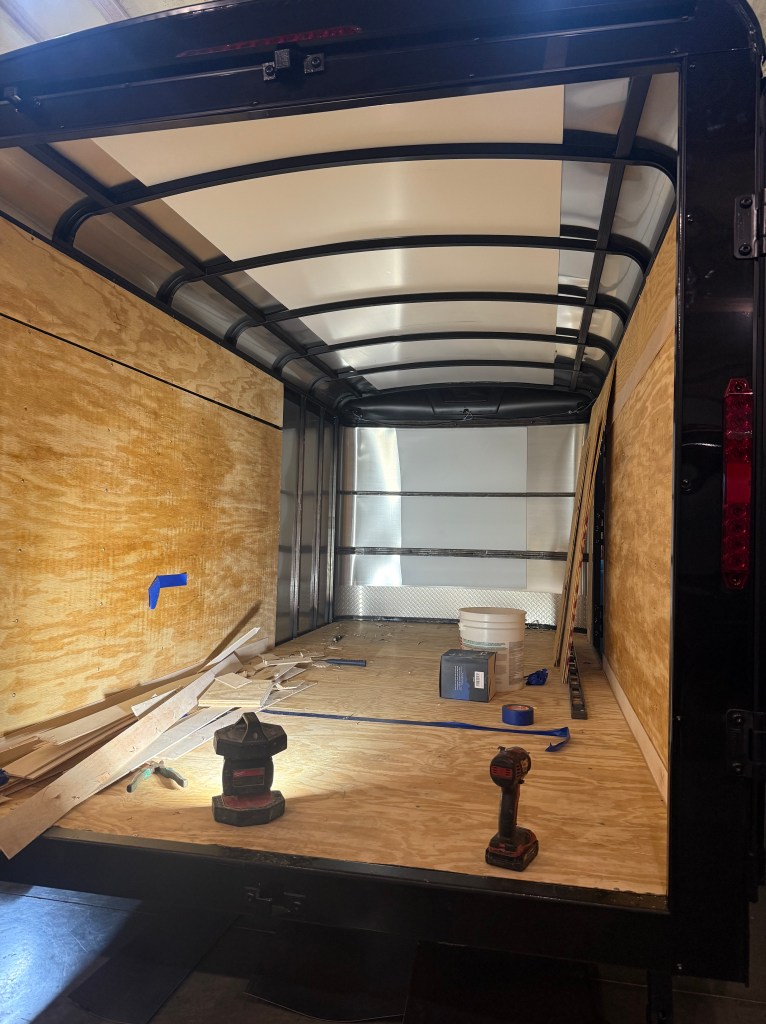
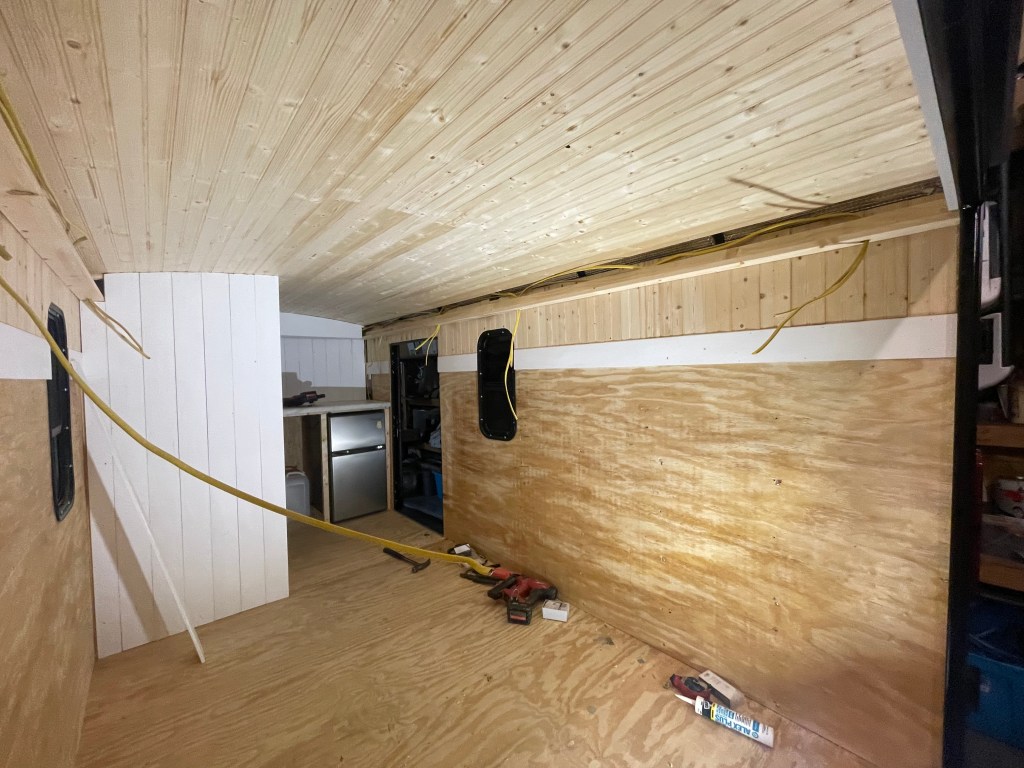
Starting out, I gutted the interior and insulated the walls and ceiling with 1″ styrofoam. I used spray foam to fill in the cracks, then replaced the plywood sidewalls that came with the trailer. For the ceiling, and partway down the walls, I used 1/4″-thick tongue-and-groove paneling. I then used a primed, 5-inch baseboard I had leftover from a previous job as a kind of decorative band board (leftover supplies come in handy sometimes).
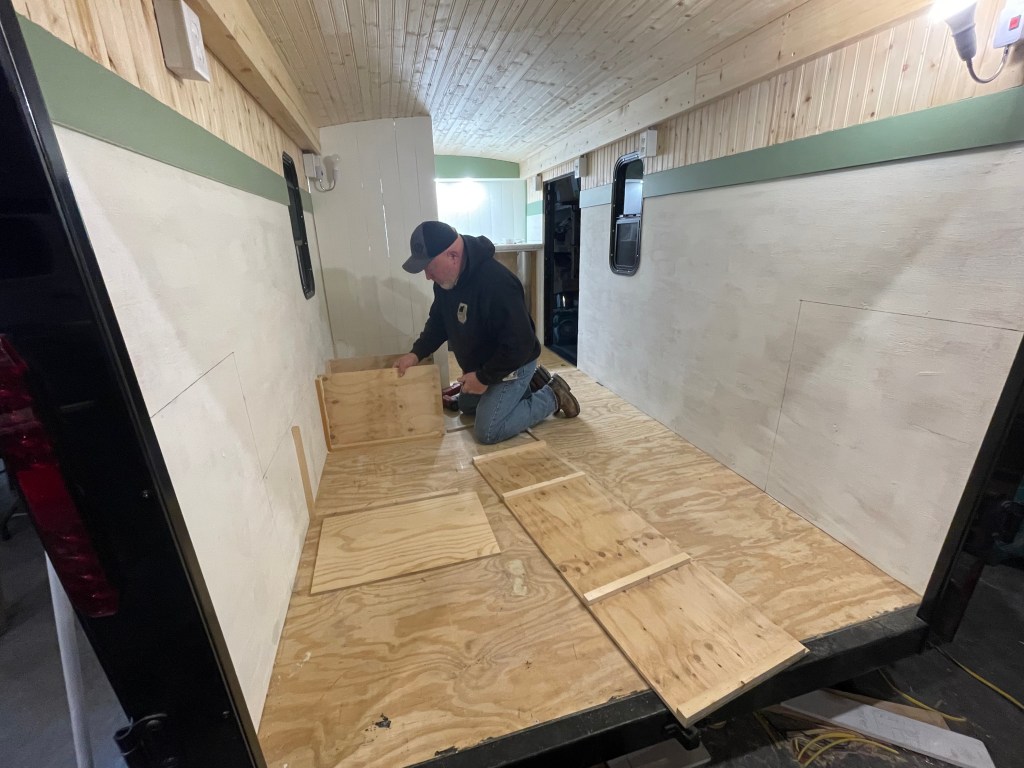
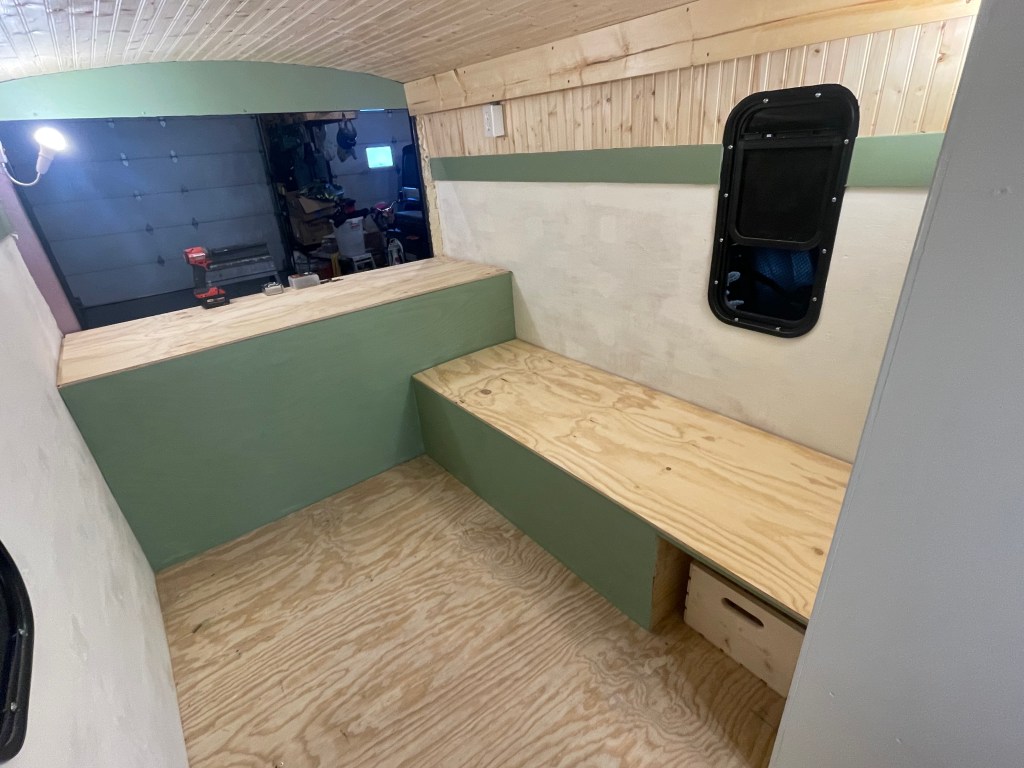
I wanted to have a lot of storage, so we opted for an L-shaped bunk bed type of sleeping arrangement. One bed is elevated across the back of the camper, while the other bed is lower, along the far wall. This bed serves a few purposes: 1) We can use it as a couch during the day, 2) The storage underneath makes the back storage a bit longer for bigger totes, or fishing poles, 3) Of course, the bed.
We have barn doors in the back which opens up the storage, where I keep the bigger items. This is why we opted for a taller bunk across the back, but there is also storage under the bed inside the camper.
Since the camper is only 12-feet long, we don’t have a lot of room for windows, but we also didn’t want a dark camper. We ordered 2, 12″x24″ RV Windows with tempered glass, and vertical sliding mesh screens. I installed one on one side and one on the other side of the trailer.
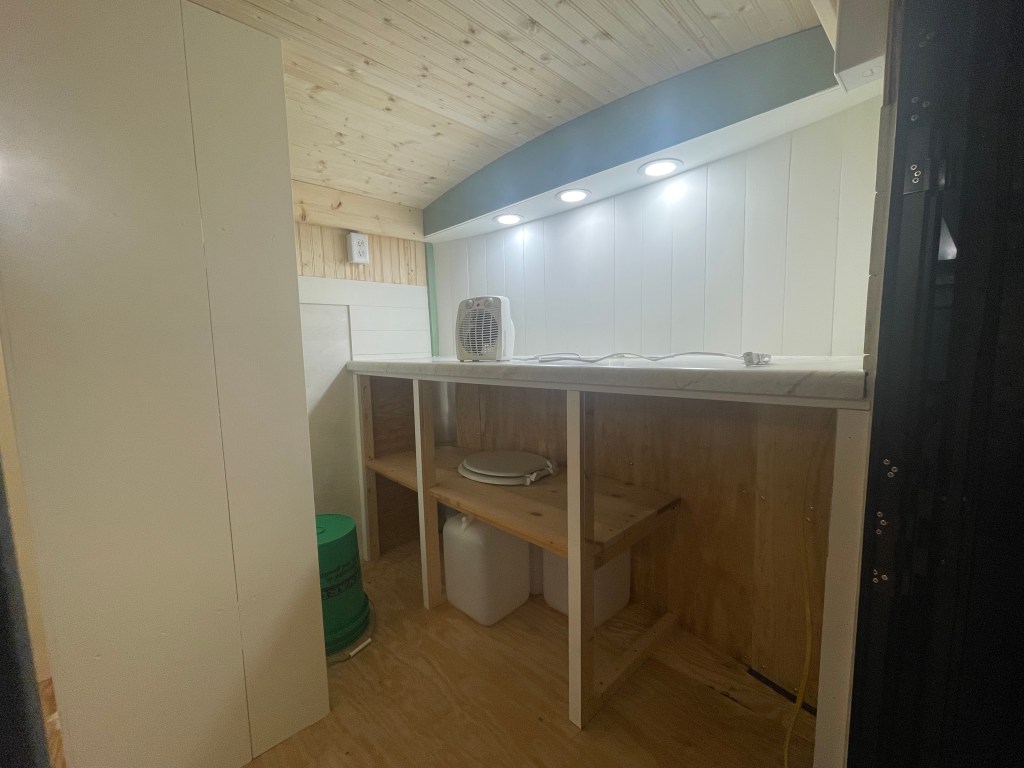
Across the front, we went with a small kitchen, which houses our small refrigerator, microwave, and a 15″ bar sink. Underneath, we have our power source, two, 5-gallon water jugs; one for fresh water, the other for gray water. We also now have a 5,000 BTU Smart Portable Air Conditioner (which did not go on our maiden voyage, but I will explain that later), as well as shelves for toilet, and kitchen supplies.
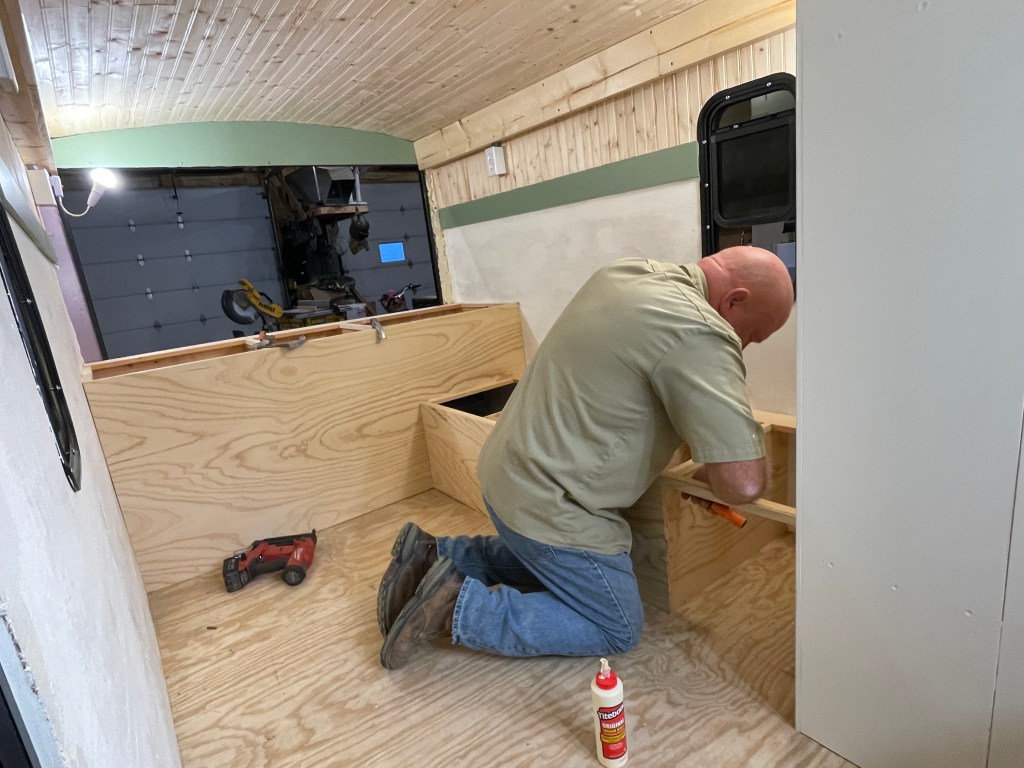
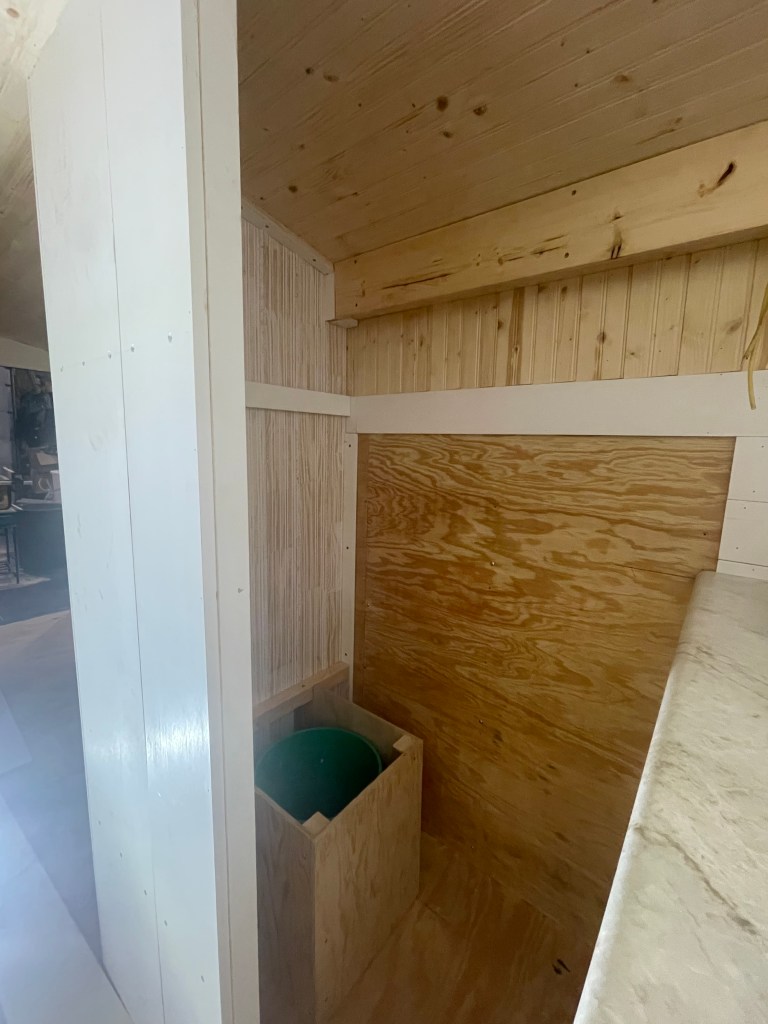
Between the lower bed and the kitchen, I built two walls to house our dry toilet. So, we do have a bathroom, but not a shower. We decided to go as light as possible with this build, and opted to leave out the shower, water tanks, and a lot of electrical.
With our dry toilet, imagine a 5-gallon bucket with trash bags and horse bedding pellets, only really, it’s a lot nicer. And if you’ve ever stood by and handled that flexible hose to empty those black tanks…well it’s got to be done! Remember what Cousin Eddie said in Christmas Vacation. So the dry, composting toilet was our answer. It’s simple, it’s cleaner, and we have had no odor issues. Especially after installing a 1.5-inch exhaust fan that vents under the rig.
When I began building this camper, we had a time limit to get it out on the road. It was November and we were scheduled to travel to Florida for Christmas, so the clock was ticking. Therefore, we got done what we could, to make the camper livable and useable, and we would finish the rest when we could. After all, this was supposed to be our Winter project. So we didn’t lay the flooring, and the plywood floor worked just fine, with rugs on the floor for the first trip. Hey, every camper build is a work in progress and the beauty is that you can always change what you don’t like.
For electrical, I wired the camper with a residential 12-2 with ground, with standard receptacles and switches, and LED lights, but use the Bluetti Elite 200 V2 for power. Above the kitchen sink we have recessed LED lights, as well as two, plug-in LED adjustable lights which can be moved as needed. Sometime I’ll tell you about the Bluetti, but I’ve left the link for you to view it online (we bought ours through Amazon).
We are not endorsed by any of the companies of the supplies we used, but we will post links so you can research them yourself. Today it’s the Bluetti, because your power source is important. Always look things up, so you can decide what you want to use, and what will work for you and your conversion project. Everyone is different. So, use what info you want and discard the rest!
We have learned that every cargo conversion build is a perpetual work-in-progress. Even when you think you’re done, and there may be months in between, you might find something else you like better, and give your camper a little update.
Since ours is still not completely finished, we are still updating. The fun in this is that we will be documenting as we go, so not only can we see how far we’ve come, but so can you!
If you would like to see the current finished product (what we went with on our maiden voyage), check out the slideshow on our YouTube channel! We’ve dropped the link below. Also, be sure to Like and Subscribe, as we will be posting more slideshows, links and videos in the future, as we begin our Camping Adventures.
Until then, we’ll be hanging out in our pole barn, updating and waiting for warmer weather… as well as scouting out campsites in our area. Keep checking back, and subscribe to this website, as well. We’re looking forward to the travel adventures of 2026! We hope you are, too!
Until then, travel light, have fun, and drive friendly!

Here are some links:
